Showing posts with label Decor. Show all posts

July 22, 2013

Word Wall, Homework Club, Birthday Prizes

Hey everyone! I have been hard at work in my classroom these past few weeks! I go back to school in 3 weeks from today and the student go back a few days after that. I can't believe how fast summer has flown. 

So I have some pesky cupboards that NOTHING would stick to. See I have to use my cupboards as bulletin board space because I have two tiny bulletin boards. Anyway...in the middle of the night I had an epiphany! Wrap everything around the cupboard door and tape it to the backside. So here is how I did it!
I cut my pieces and put tape around the edges of the inside of the cupboard door. Then I put the paper over it and taped it to the inside.

Then I put tape around the edges of the paper. I scrunched up some streamers and made a cute double border.


And then it became my word wall!! I LOVE how this turned out. And yes...I used a TON of tape, but it was worth it :)

Here is a pic of my alphabet above my white board. I finally put it up using sticky back velcro and it worked like a charm.

My birthday prizes!! A silly straw with a 'Happy for U' sign. They also get to pick out of the treasure box!

This is for my homework club. I loved Tara's idea and had to try it for myself! If students bring back their homework then their number stays on here. By the end of the month the students who are still on here will get to eat lunch in the classroom and get a prize of course!


Don't forget to check our Chapter 7 of our Guided Math book study! It is all about conferring with students during guided math. I am seriously LOVING this book!

And of course...go link up with Tara

June 15, 2013

Reports, Paper Drop and THE BEST parent letter to her kid

You all are such brilliant people. Brilliant I tell you! My classroom is a much better place because of you! Yes, you! I get so many ideas from you all and I seriously appreciate you!

Here are a few of the latest ideas I am lovin'.

Have the students create a book trailer and then attach a QR code to it. From Lessons with Laughter.

Such a smart idea! Laminate folders. Write title of assignment on folder with expo. Tape list of students on back of folder. Have students mark their name when they turn the assignment into the folder. I'm doing this! Thanks for the brilliance Ms. Lesson Plan Diva!!


Twine around a block...why am I not this smart?


And last, but not least, an amazing letter from a mom to her child on the first day of school. I need to twist this for my students. I wish I could talk about God. I do sharing time in the primary in my church which means I get to see all the kids. I will definitely use it then.  Let me know what you think!


June 11, 2013

Making Your Classroom look "Put Together"

Linking up with Holly!

There are some classrooms you walk into and they just feel put together. You know what I mean? Well, I have been looking at Melanie's website from Schoolgirl Style and all of her classroom decor posts are 'put together' and look fabulous! I decided to try some of her cleverness.

I put up a few bulletin boards over the past few days. Every single one of them have the same base colored paper and same borders. 
Even though my classroom is all stacked up for the summer, these bulletin boards have already changed the feel of my room! Even my four year old commented on how "pretty" they made my room.  Such a simple thing that makes a huge impact! 


June 10, 2013

Chalk Board Calendar Set & Alphabet for Monday Made It

Linking up with the fabulous Tara!

I didn't really make this, but I laminated and cut, cut, cut so that is like making it right?
These are for my calendar! I purchased them from the amazing Melanie at Schoolgirl Style. All of her stuff is super cute and trendy. I love it!

And these are my alphabet letters that will be hanging above my white/Smart board. I'm so happy with how they turned out!
I cut so much out! I had to cut around each letter then paste onto the blue paper and cut around the blue paper. After they were laminated I cut around them again. I had a blister on my thumb by the time I was finished. It was totally worth it though!

My classroom is going to be decorated using Melanie's Organization Theme. You really need to go check it out!

For classroom decor and organization visit Schoolgirl Style

Two more things...


If you are interested in donating to my aMAzInG 200 follower giveaway click here.

We will be hosting a book study on 

Product Details

and we would LOVE to have you join us! The ebook is only $9 on Amazon. We will be starting on June 24! Happy Monday!!

June 3, 2013

Monday Made It! Student picture frames

Linking up for the summer's first weekly Monday Made It!! Don't you love summer and gettin' your craft on?


So a couple months ago I found this CUTE bulletin board at Learning in Wonderland. I LOVE IT!
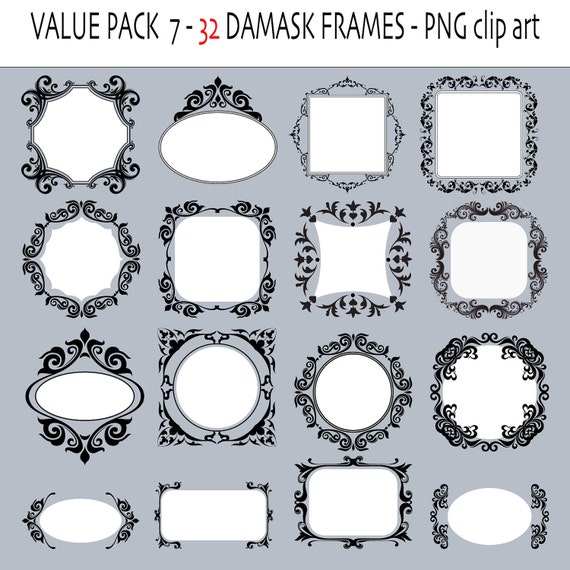
I LOVE this wall and want to do the same thing in my room next year. So I found these super cute damask frames on Etsy

32 damask clipart  frames or labels - Digital frames - Clip art labels - 32 PNG files - INSTANT DOWNLOAD Pack 214

I printed, laminated and cut cut cut! And here are some of the frames for my bulletin board which will be a bright blue background with white and black border...

20130602_214737.jpg
My students will be writing about themselves and switching out the paragraph underneath their frame during work on writing time. I'm excited about the student recognition and the sense of belonging this will bring to my classroom. The writing about yourself to display for other students to read is also a great incentive for writing.

How do you recognize your students in your classroom?


April 30, 2013

Classroom Theme for Tried it Tuesday!

Linking up with the awesome Holly!

I always start getting ready for next year in, oh, say, February. I know, I know... February? Really? But my mind just starts wandering about that time of year and it focuses on the upcoming year.

So, off I went to one of my favorite sites. Schoolgirl Style. Seriously everyone, if you haven't stalked looked at this site then you should go there now. Melanie is AMAZING when it comes to setting up and decorating a classroom. This year I had the Polka Dots and Daisies theme and I get multiple comments daily on how inviting and warm my classroom is. Love it!

The hard part for me is trying to figure out which theme to use. Melanie and tons of them and they are all wonderful and diverse. Well, I decided and took the plunge yesterday! Here is my theme for next year...

For classroom decor and organization visit Schoolgirl Style

Isn't it beautiful?!?!?!! I purchased all the cute cut outs for $8.50 from Melanie's shop and her shop has everything for you. The digital items are editable and ready for me to print and laminate. I am so excited! Sosososo excited!

That is my Tried It Tuesday for ya! I will update as things get made and laminated! Make sure to link up with Holly.


March 23, 2013

Create hanging daisies! So Simple...

You know those cute daisies that you can buy and hang? Well, I make my own all the time and I love it because I can make them any size I want and it takes about 5 minutes.


The paper I LOVE to use is the butcher paper that is used to cover bulletin boards. Just cut the papers down to the size you need. If you want a 12x12 inch daisy then use 3 squares cut to that size. Same thing for any other size. But if you want an 8 1/2 inch diameter then use just two regular pieces of paper.

Here is how you do it...

1- To make a 8 1/2 inch daisy you will need two pieces of 8 1/2 x 11 paper. Fold both papers in half hamburger style, then in half again and then again for a total of 3 folds. Crease generously. Unfold and then use the folds to create the accordion style. 


2- Fold the paper up and round the edges off on both ends. Do this to both papers.


3- Use double sided tape to tape in between each crease on both sides. You can't see it very well but there is a spot of tape about 1/2 inch above my finger on the crease. Make sure to do both sides or the middle won't hold on your daisy. Do this to both papers.

 This is what they should after the taping.

4- Use the double sided tape to attach one side of the page to the other side of the page to create a fan.
 This is what they should look like after attaching the sides together.


 5- Now tape the sides of both papers together so it looks like the picture below.


6- Tape the other sides together to form your paper daisy.


That is it! Hang using ribbon and you are set! PLEASE let me know if you have any questions or comments.


February 18, 2013

Math Tasks and Cute Clipboards!

I LOVE LOVE LOVE this post from Carol at Still Teaching and Learning! She talks about task oriented work rather than worksheets. Go check her blog out!


I've wanted to make some of these for a bit now and I like how Melanie and Cindy's boards turned out! I'm SO going to do this. If you haven't been to Inspired in Style, then you are missing out.
IMG_0277


January 27, 2013

Awesome Ideas from Others

When I first started this blog it was to collect ideas from others and I just posted ideas I found so I could easily find them again. Well, I've kind of gotten away from that and I really miss it. I happen across SO many fabulous ideas and I want to get back to posting them. My goal is to do this weekly so I can remember all your fabulous ideas.

Metric Conversion in Math Journals from Runde's Room and the Math Reflection Fans


Middle School Matters blog!!! Awesome blog for middle school teachers.


Mrs. D's Firsties has the CUTEST digital paper! And it is on sale today only!!!!!!!!!!! She has every color scheme and holiday scheme you could need.


I REALLY want one of these babies!


I have been thinking a lot lately about what my classroom should look like next year. I want to start collecting stuff now because so many fun holidays are coming up which makes it easier to find stuff. Here are some of my choices I have been stalking this week. All from Schoolgirl Style.
Sunny Skies
details-owl-theme_thumb.jpg
Which is your favorite?? 


Those are my finds this week. Maybe I should make this a linky so you can share what you have found? If you would link up leave a comment! See you around :)


January 7, 2013

A Freebie, Bragtags, Pinwheels, Game Boards for Monday Made It

Oh Tara, your linky is my monthly inspiration. Seriously, I look at so many Monday Made It links. When this party rolls around Pinterest is put on hold. I'm lovin' it! 


First of all, Bragtags. Have you seen these floating around? Well I have and I can't wait to introduce them to my kids. I've the below so far and am working on monthly birthday, monthly attendance, and I want to get my team on board as well. 

These paper fans are not the ones in my classroom. I can't find my pictures I emailed to myself, but I will take more today. So expect an update. These are very simple to make.

Decor. Paper fans strung on lines. Could add a lot of color to the reception.

Update!
Here is my picture. Yes, it is on its side. I like you, but deal with it. Crazy day.
1. Get three pieces of square paper and fold each one like an accordion.
2. With the accordion all bundled up, fold the entire thing in half right at the middle so your accordion ends now touch.
3. Tape/glue the ends together.
4. Repeat with other two pieces of paper.
5. Tape/glue each accordion together to form a wheel.
6. String.
These are so much fun to make, but make sure you are using some awesome tape/glue!

Lastly, some game boards. These can be used for any subject at any age. I made a set of four and my students are loving them. 
I will give the set of four away until Friday! So if you would like a set follow my blog and leave a comment with your email. 


Happy Monday Made It everyone and may the odds be ever in your favor!